- Line
- Color
- Value
- Shape
- Space
- Texture
- Alignment
COLOR THEORY
- Complementary: 2 colors that are on opposite sides of a color wheel. This combination provides high contrast and high impact color combination together, these colors will appear brighter and more prominent.
- Monochromatic: 3 shades, tones and tints of one base color. Provides a subtle and conservative color combination. This is a versatile color combination that is easy to apply to design projects for a harmonious look.
- Analogous: 3 colors that are side by side on the color wheel. This color combination is versatile, but can be overwhelming. To balance an analogous color scheme, one dominant color, and use the other as accents.
- Triadic: 3 colors that are evenly spaced on the color wheel. This provides a high contrast color scheme, but less so than the complementary color combination-making it more versatile. This combination creates bold, vibrant color plates.
- Tetradic: 4 colors that are evenly spaced on the color wheel. Tetradic color schemes are bold and work best if you let one color be dominant, and use the others as accents. The more colors you have have in your pallet, the more difficult it is to balance.
USE OF DIFFERENT TOOLS ON PHOTOSHOP
- Quick selection tool (W): This is a selection tool that is used to select an aspect of the image that is different from the rest and is used to edit the content. This tool allows isolation so you can edit without affecting other part of the image.
- Crop tool(C): This tool removes the part of an image surrounding the part of an image. It can be used to remove unwanted elements.
- Clone stamp tool (S): This is a tool used to remove any unwanted part of
the image. It does that by cloning the selected pixels.
- Eraser tool (E): This is used to erase anything on the layer.
- Brush tool (B): It is used to paint your document.
- Gradient tool(G): This tool is used to create gradual changes of color and light across an image or text. It can be used to blend with other images. There are different types of gradients on Photoshop.
- Paint bucket (G): This is used to select a color or texture and apply it to a shape.
- Pen tool(P): This is also a selection tool with many applications. It can be used to draw lines and shapes. The marks to make a pen tool are called tarts.
- Text tool(T): This tool is used for text characters. The character tab in the text tool is made up of text size, font type, font family.
- Shape tool(U): In the shape tool bar there’re different types of shapes available {Rectangle, Rounded rectangle, Ellipse, Polygon, Line, Custom Shape}. To draw a perfect shape you use the shift key.
- Custom shape tool (U): There’re different types of icons and symbols. You can create a customized shape and save it on Photoshop. This implies that you can convert any image into a custom shape.
Steps to create a custom shape
1.Open an image with no background by pressing ctrl ‘O’ or cmd ‘O’ on the keyboard.
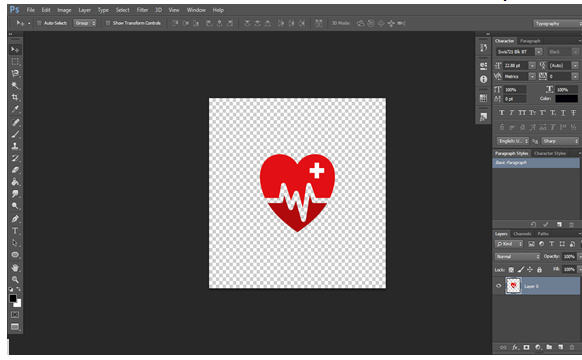
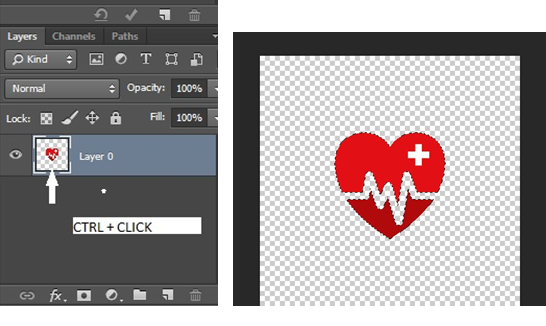
2.Select the image and you can do this by pressing ctrl and clicking on the layer thumbnail
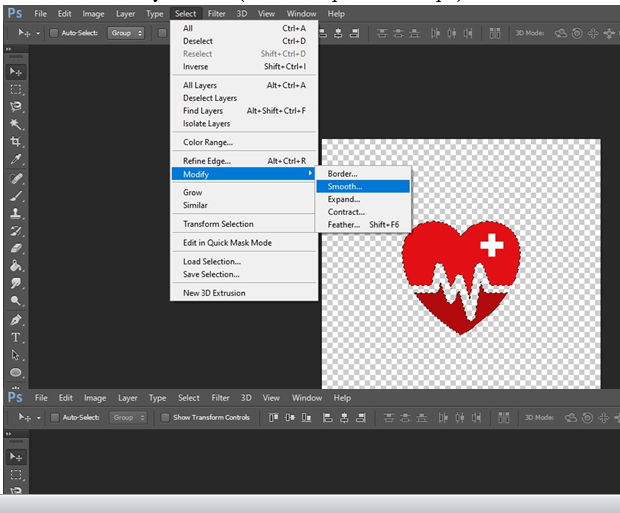
3.Go to select>modify>smooth (set the sample radius =1px)
4.Go to paths
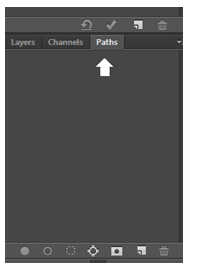
5.Select “make work path”
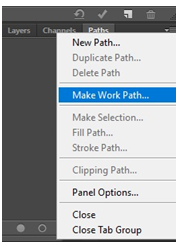
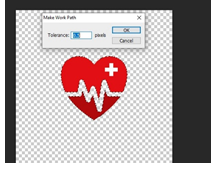
6.Set the tolerance to 0.5px
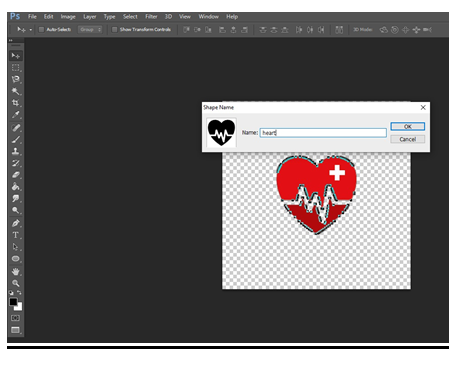
7.Go to Edit > Define Custom Shape
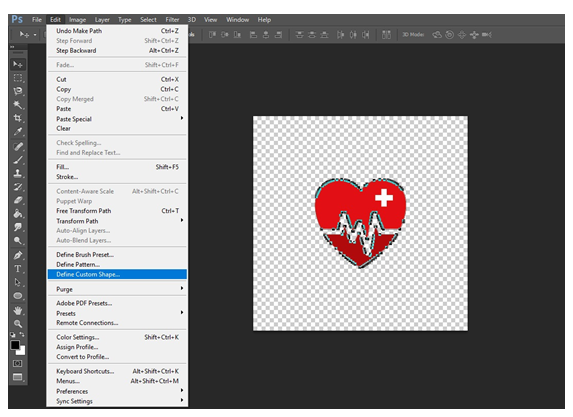
8.Name your shape. After which you can go to your custom tool bar and then you find the newly created custom shape.
MAKING SELECTIONS ON PHOTOSHOP
On Photoshop, there are several ways selections can made using different selection tools on Photoshop. Some of the tools you can use to make selections are rectangular marquee tool, elliptical marquee tool, quick selection tool, lasso tool, magnetic lasso tool, magic wand tool, polygonal lasso tool, pen tool.
Rectangular Marquee Tool (M)
This tool can be found after the move tool, it is the second icon from the top or simply press ‘M’ on the keyboard
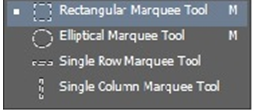
Using this tool to make selections is a very easy thing to do, simply click at the start point and with your mouse still on hold, drag to the bottom area (your selction shows dotted line). Take a look at the image below
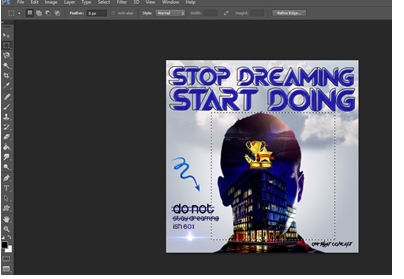
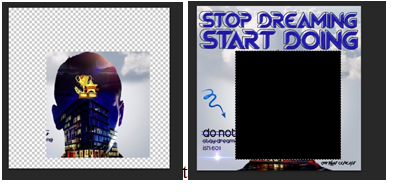
If I should press ctrl J or cmd J (to duplicate), the selected area will be duplicated or if color fill it with black, only the selected area will be filled with black color. To remove or deselect your selection, simply press ctrl ‘D’ or cmd ‘D’. (note that with your selection tool, you can make desired effects on selected areas). Also most often times, this selection tool are useful for square selections.
Elliptical Marquee Tool (M)
This selection tool is similar to the rectangular marquee tool, they are embedded is same tool bar. The shortcut is also ‘M’; the tool works same way as the rectangular but just that it draws oval shaped selection.
Quick Selection Tool (W)
To pick the tool on photoshop, simply press ‘W’.

Take a look at the image below, for this image I will like to make a selection of the plate of food and duplicate it without the background

To make my selection, I will simply hover my quick selection tool to the top left corner of the plate and click my mouse once which makes the initial selection.
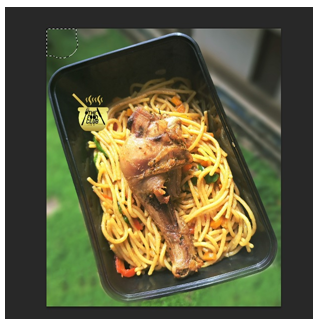
After that I will add more slections to it by pressing shift (which means to add selection) or simply go to the options bar at the top and there you will find three selection modes (new selection, add to selection, substract from selection). The ‘add’ is at the middle and indicated with a plus (+) sign; the “add to selection” has already been selected.

This tool can be used in two ways. The first way, is to click and drag over the area you want to select. As you drag, Photoshop continuously analyzes the area, comparing color, tone and texture, and does its best job to figure out what it is you’re trying to select. To add to my initial selection, I’ll click and drag along the edges of the image; the area I drag is added to the selection. As long as the cursor is kept outside the plate and is not dragged over the food, only the background of the plate of food will be selected. You can always press ctrl “z” or command “z” on your keyboard to undo any unwanted selection.
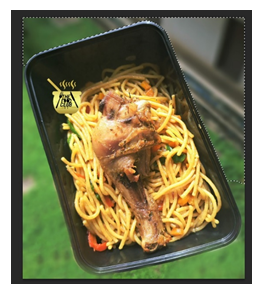
Futhermore, an unwanted area of selection can be removed. It is recommended that you try not to select everything in a single drag; using a series of short drags thereby releasing your mouse button at intervals is a better way to use the tool.
Also, to resize ypur cursor, press the left bracket key ‘[‘ to make the cursor smaller and the right bracket key ‘]’ to make it bigger (making your cursor smaller works best).
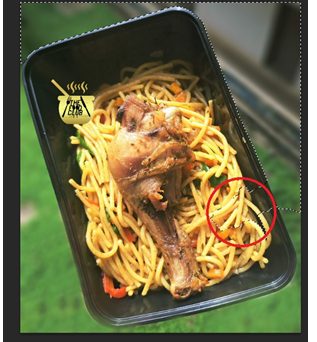
Hold down your alt/option key (this temporarily switches the quick selection tool to “subtract from selection”) then it will show a small minus (-) sign and with the alt/option key still held down, click and drag the area that needs to be removed.
Magic Wand Tool (W)
The magic wand tool is nested with quick selection tool at the tool panels.

The magic wand selects pixels based on tone and color. If I click an area on the image below, photoshop looks at the tone and color of the area that was clicked and selects pixels that share same solor and brightness values. This tool is useful in selecting large areas of solid color. In the image below I want to select the white background, all I need to do is to click anywhere on the white background with the tool. Photoshop will recognise that the white area has been the white area has been selected and will instantly select every pixel in the image that shares same shades of white.
